A Rough guide to Sig Creation
|
Step 5 - Manipulating The Images Part 2
|
|
|
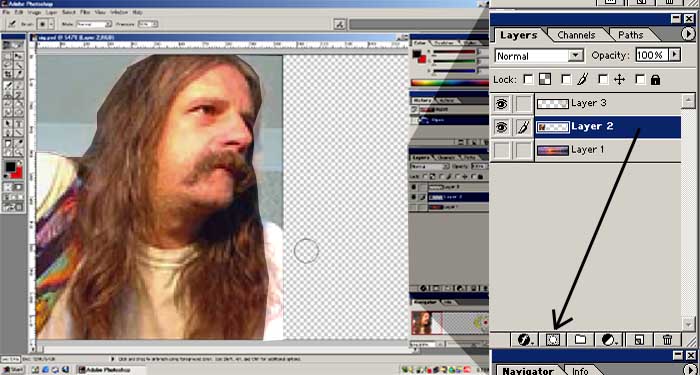
To remove the parts of the photo which are not needed
can be done a number of ways, we could use the Lasso tool, trace around
the edges, creating a custom shaped marquee and deleting the area enclosed.
I always find that the edges are too sharp with this method. By far
the better method here is to create a mask and airbrush the parts we
don't want out of the picture. I like to work the image as large as
possible for this. The image below shows how I have magnified the photo
and removed the background sunset (although you can leave the background
in if you wish). |
|
|
|
|
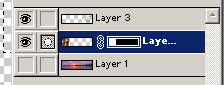
| The layer box will now show two thumbnails for layer 2. |
 |
|
|
The colour selector will also turn to black and white.
You can work the layer in normal mode by clicking the colour thumbnail
in the layer 2 slot or switch to mask mode by clicking the black and
white thumbnail. As I have only just created the mask, I am in mask
mode.
|
|
The mask mode is very useful. While the foreground colour in the selector is black, the airbrush tool will remove whatever I airbrush over. If I make a mistake and take out too much of the image, I can click the double ended arrow in the selector to make the white become foreground. This mode replaces the original image. |
|
|
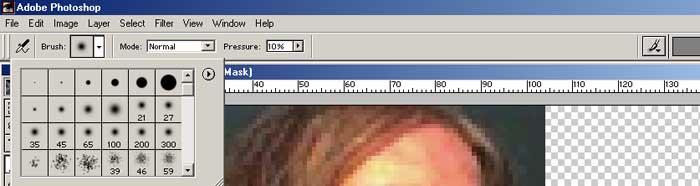
Select the Airbrush Tool. A circular cursor will appear when you move over the image we are working on. |
 |
|
I can now select the size of airbrush that I require. For this image I select the fuzzy icon two boxes to the left of the one marked 21, This should allow me to get into all the corners. I have also selected Normal mode and a pressure of 10%. If you use a pressure higher than this, it tends to leave the sharp edges again. |
|
 |
|
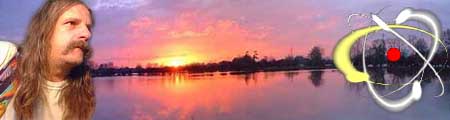
| Airbrush away. Remember, if you make a mistake, switch the selector to white and airbrush the image back in. When you are satisfied that all the unwanted areas have been removed, take a look at it with the background back on. This sometimes shows up any missed bits. | |
| The final result of my labours looks like this -: |
 |
| When you have done, turn on the other layers once more and view the sigs actual size ('View' 'Actual Pixels'). | |
 |
|
|
It's coming on nicely. Next, we will add the text.
|
|