A Rough guide to Sig Creation
|
Step 8 - One final touch
|
|
| I thought it might be fun to modify the image in the background
so that it turns into a negative behind the atom logo. This should look
quite good and will also allow demonstration of another useful feature
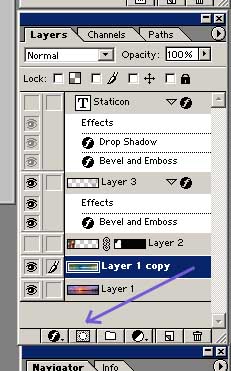
of photoshop. Start off by turning all the layers off bar the sunset background (Layer 1) and the atom logo (Layer 3). Select layer 1, right click on it in the layers box and select 'Duplicate Layer'. Click OK on the dialogue box that pops up. This will create a new layer containing the sunset picture called Layer 1 copy. |
|
|
|
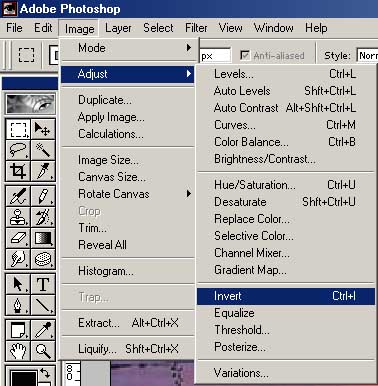
Select the new layer then select Invert as shown (Left). |
 The sig now looks like this |
|
|
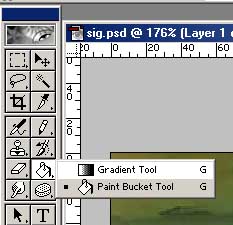
Next, we will need the Gradient tool which can be found on the toolbar in the same spot as the Paint Bucket Tool. Most of the tool spots in the tool bar have various functions which can be selected by right clicking where it resides and selecting accordingly. Select the gradient tool. |
 |
|
Selecting the gradient tool will change the status
line and there are some parameters to set up here.
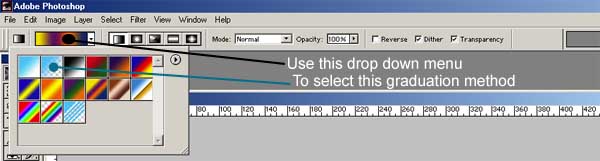 Ensure that that Mode is set to normal. I also have Opacity set to 100% and the Dither and Transparency check boxes ticked. | |
|
|
Back in the layers box, drag the new layer to the 'Add A Mask' icon as we did for the photo of me. |
|
Ensure that the colour selector is on black |
 |
|
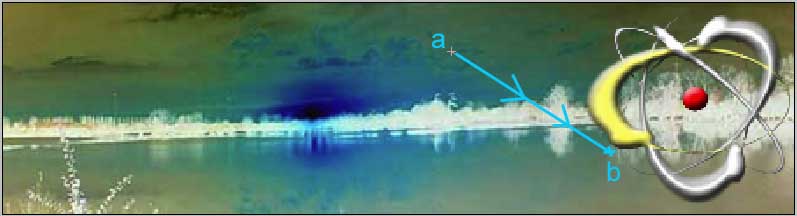
Using the gradient tool, click point (a) and drag a
line to point (b) as shown below. |
|
|
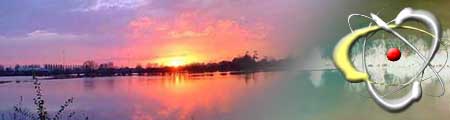
This should leave you with the image as shown below.
 |
|
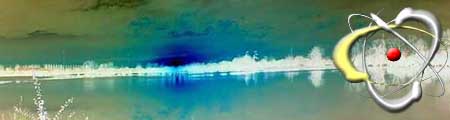
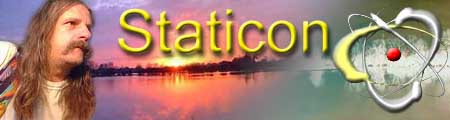
| Now turn the other layers back on to see the final result. | |
 |
|