A Rough guide to Sig Creation
|
Step 2 - Starting The Sig
|
|
| At the time of writing this tutorial, I am working with PainShop Pro 10 so that is what this walkthrough is based on but some, if not all, should apply to other versions. Please remember that this is not the graphics package of choice for me so this will be only a simple tutorial. | |
|
Open Paint Shop Pro and load in the images you are going to use 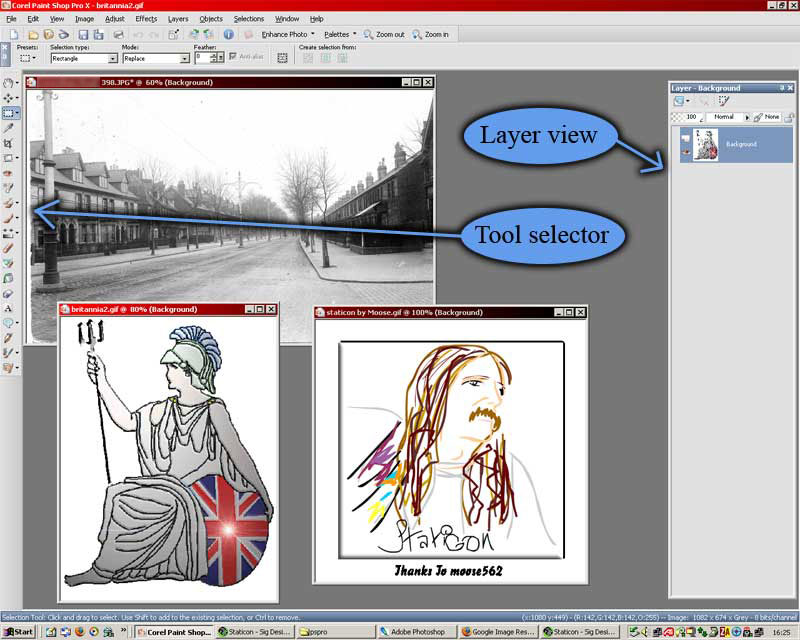 |
|
| Above is how my screen looks. There are two of the sub-windows which
need to be on display. These are the layer view window and the tool selection
window. If they are not there, they can be toggled on or off with the 'View' drop down menu. Just select the one you need to show or hide. In the example to the right I have selected 'Standard', 'Status' and 'Tools'.
|
 |
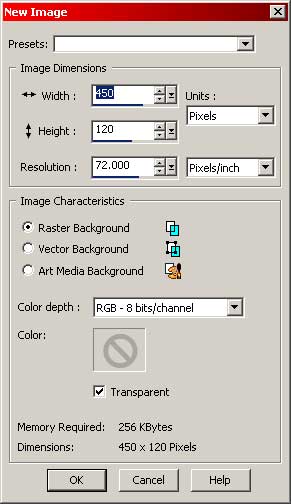 |
The Eidos forum sig size regulation is 450 pixels wide by 150 high. I tend to make mine 450 by 120 to allow text above or below the signature. To start our new sig, select 'File' 'New' and fill in the dialog box as shown on the left. |
|
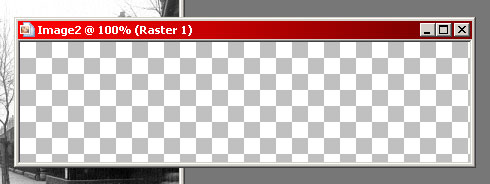
This should give you a new, empty workspace like the one on the right. |
 |
|
We are now prepared and ready for the next step |
|