A Rough guide to Sig Creation
|
Step 4 - Preparing The Images Part 2
|
|
|
We still have to prepare the drawing of me and the image of Britannia for insertion into the sig. We will use the same method for both of these images. |
|
| For starters, I will need to crop all the borders and writing off of the drawing so that we go from this |
 |
|
|
To this. Simply use the 'Select Tool' to draw a marquee around the area we wish to keep, then use the 'Image' drop down menu and select 'Crop to Selection' to remove the surrounding area. |
|
Next, select the whole image with the 'Select Tool' once again and cut the image using either the 'Edit' drop down menu and selecting 'Cut' or by pressing CTRL+X. The Eyeball icons (right) allow you turn layers on and off. For this operation, we need to turn the background layer off so click the eyeball. You will not see any change just yet but be patient. |
 |
|
|
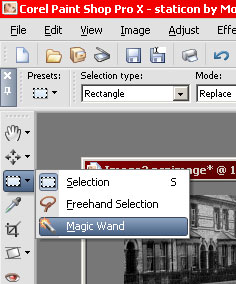
We now need the 'Magic Wand' tool from the tool menu |
|
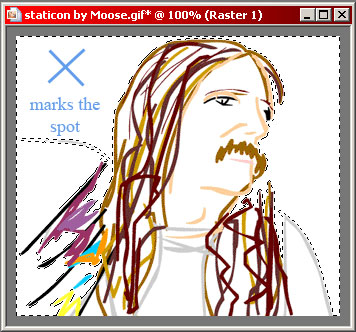
Simply click the 'Magic Wand' in the white area as shown on the right. A complex marquee is placed around the image. |
 |
| Press the delete key and most of the white area is removed. If we had not turned off the background layer, we would not be able to see the grey and white checkerboard background which indicates total transparency. | 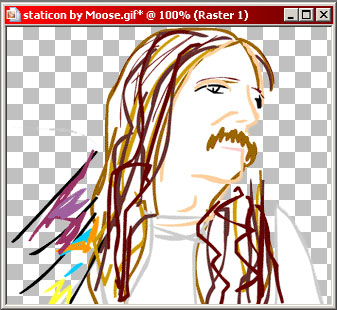 |
|
|
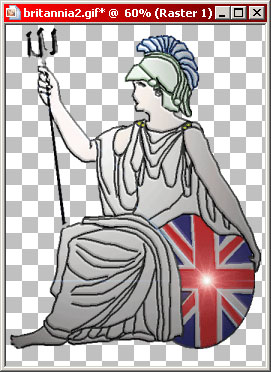
Repeat the process with the image of Britannia and we are ready for the next step. |
|
Next, we will resize the images and place them onto
the sig.
|
|